


 2023-04-05
in
2023-04-05
in

 9 min read
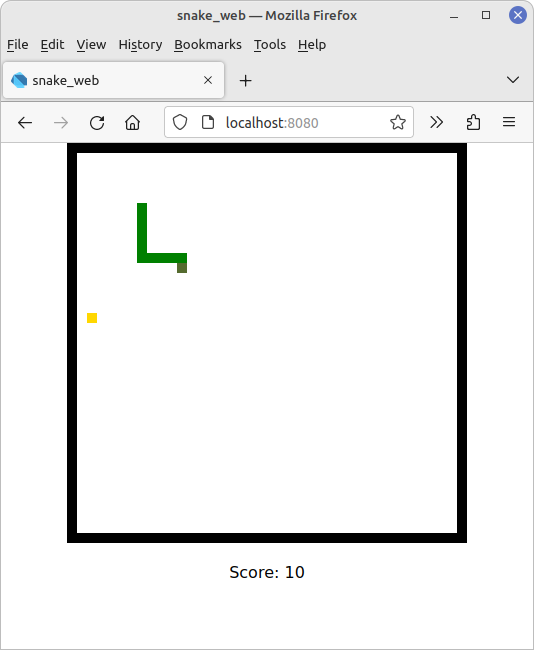
Dart’s heritage is as Google’s 2011 attempt to have a better language for writing websites than JavaScript. For various reasons TypeScript came closer to the mark for developers and Dart has gone on to have utilization in other areas. But its web app heritage is still there for the world to use. This post continues The Dart Snake Project by doing a web app implementation using nothing but the core Dart libraries. The code for this project, as well as screenshots, and other details can be found at the dart-snake GitLab project page . This is open sourced under an Apache 2.0 License.
Although server side Dart definitely plays second fiddle to Flutter now, there are some great resources of how to use it for building REST servers and web apps in the Dart.Dev Tutorial section . As with the Flutter example I’m going to be covering the details at a level sufficient to understand what is going on but to truly delve into it I highly recommend the tutorials.
Dart Web Overview
The Dart Web implementation of Snake is going to look a lot like the Dart CLI implementation in terms of simplicity. Dart Web is essentially directly manipulating the Document Object Model (DOM) like you would through JavaScript. Thanks to how modern browsers work you’ll even be able to debug your application in native Dart code in the browser’s Developer Extensions on Chrome/Chromium and FireFox. Dart Web also supports hot reload so once you fire up the server you’ll be good to go to just make changes and have it appear in the browser. To help make all of this easier I recommend installing the webdev tools, described in more detail here by executing the command:
dart pub global activate webdev
Creating a web app project in Dart is as easy as using the web template when making your Dart project:
dart create -t web mywebapp
This will create a directory app structure like below (there are more files but I’m cutting it down for simplicity):
.
├── pubspec.yaml
└── web
   ├── index.html
   ├── main.dart
   └── styles.css
This should look pretty straight forward if you’ve done any web development before but:
- styles.css is where you’ll put style information just like in any other website
- index.html is where someone is dropped off when browsing to the website and where we will be injecting our objects
- main.dart is where our program will be and can be thought of in the same way as a JavaScript program file
- pubspec.yaml is where we will be bringing in additional dependencies as we need them.
With the webdev tools installed this can be run for development purposes with a webdev serve command or you can run webdev build to build it into a free-standing set of files you can host from a traditional web server in production.
Dart Web works by leveraging the dart2js compiler that turns the Dart code into JavaScript code in the background. That’s why we don’t need a Dart runtime for this to work in the browser. The essence of your program is then just manipulating the DOM like in JavaScript. For example the basic app in the template has a body that looks like this:
<body>
  <div id="output"></div>
</body>
…and the Dart code manipulates this by querying for a div with that ID and then setting its value:
querySelector('#output')?.text = 'Your Dart app is running.';
We will be able to add and remove children, invoke CSS class styling, create styling on demand, manipulate the usual metadata tags for elements etc. Dart provides objects and methods for working with the DOM just as you would in TypeScript/JavaScript.
With that very brief introduction lets get to our design.
Presentation Layer Design
As I wrote above, this design is going to look a lot more like the CLI design, but even simpler, than the Flutter design. We don’t have an overarching framework that handles the flow of visual components or widget tree management. We have direct and absolute control over the presentation system, in this case represented by the DOM rather than terminal character locations. Because this is just DOM manipulation like any other website that is how our implementation will work. CSS is a great tool for doing this. It has a construct called Grid Layout
that allows us to flexibly control the layout of DOM elements. CSS also provides mechanisms for setting the size, color, location, etc. of DOM elements. The browser itself has keyboard event handling functions on the Window level as well. We will therefore instantiate our Game Engine object which provides the core of the system. We will wire in keyboard event listeners on the window and respond by telling the snake to change heading. We will listen to change notifiers on our GameBoardTiles which were provided by that class in the business layer thanks to extending the StateNotifier class from the Riverpod
system.
The App Layout in index.html and CSS styles
Like with our Flutter design we will have a game board with a running score during the game or a “Game Over” prompt with the final score underneath of it. We accomplish this by adding two div components that our Dart code will manipulate as the body of our HTML document:
<body>
    <div class="game-board" id="game-board"></div>
    <div id="score"></div>
</body>
Styling for these components is done with standard CSS:
html, body {
    width: 100%;
    height: 100%;
    margin: 0;
    padding: 0;
    font-family: sans-serif;
}

#score {
    padding: 20px;
    text-align: center;
}

.game-board {
    display: grid;
    width: 400px;
    height: 400px;
    margin-left: auto;
    margin-right: auto;
}

.game-board > div {
    width: 10px;
    height: 10px;
}
The html,body CSS is setting up a view that takes up the entire browser window. The score CSS is setting it up to stay centered and provide some padding around it. .game-board uses the display parameter to set it up in Grid Layout mode with the given width/height. The margins being auto will cause the given Grid div to be center-aligned horizontally. All of our tiles will be individual divs. We will want them to be 10 pixels in width height. It is important for the width of the game board to be equal to the number of columns times the width because the Grid layout wraps overflowing components when configured this way. We will also be leveraging CSS styles for changing the colors of the tiles based on state:
.tile-background {
    background-color: white;
}

.tile-body {
    background-color: green;
}

.tile-head {
    background-color: darkolivegreen;
}

.tile-food {
    background-color: gold;
}

.tile-border {
    background-color: black;
}
The names of these classes was chosen to make it easier to map te the TileState enum values, as will be shown in a moment.
The Main App
Almost all of the source code for the game is in the main.dart file. The main method, which is the entry point for the webapp, simply creates the game board and starts the game:
|
|
The setupGame method is our standard “build the gameboard and game” method you see in the other implementations. On line 5, the window.onKeyDown Stream property allows us to intercept all keyboard events that the browser window see. We will get to the code of the keyboardHandler a bit further down. The game setup method is wiring in event handlers for the our web platform:
|
|
Line 2 is where we setup the game board, which we will get to in a moment. Line 3 is where we get the DOM element that we will be manipulating the score parameter. This should match the id parameter of the div in the HTML. Now we are doing the Game wiring up. Like with Flutter there is nothing to do in the beforeStep but tell the game board to update. The afterStep is simply that plus changing the text of the score div. The same is true on game over but rather than set it to be just text we use the innerHTML property to add a line break.
Game Board Setup is extremely straight forward as well:
|
|
Line 2 is the usual initialization command from the business level logic. Line 3 again is getting the DOM element we will be writing our board into. The for loop is creating a new div element for each tile and adding it to the gameBoard DOM element. Because our GameStateTile extended StateNotifier we can use its addListener method to pick up state changes and pick the right CSS style based on the state value. How is it that that TileState knows about the CSS class style name and GameBoardTiles know how to turn themselves into div elements? We used Dart extension methods again, defined in game_extensions.dart. The element name extension is dirt simple, we could have even just done the string building in line:
extension TileStateExtensions on TileState {
  String get styleName => 'tile-$name';
}
The div building extension on GameBoardTile is a bit more complicated by still straight forward:
extension GameBoardTileExtension on GameBoardTile {
  DivElement toDivElement() {
    final x = position.x;
    final y = position.y;
    final divElement = DivElement();
    divElement.className = state.styleName;
    divElement.style.gridRowStart = '${y + 1}';
    divElement.style.gridRowEnd = '${y + 1}';
    divElement.style.gridColumnStart = '${x + 1}';
    divElement.style.gridColumnEnd = '${x + 1}';
    return divElement;
  }
}
This is a good demonstration of the standard Dart classes and methods that wrap up standard DOM objects. These mirror the same sorts of constructs in JavaScript. The one thing we needed to take into account is that explicit grid locations in CSS are one-based indices not zero like in our game. Therefore we have to add one to our given X and Y position when we wire up the style data.
That just leaves our keyboard event listener, which is very straight forward as well:
void keyboardHandler(KeyboardEvent event, Game game) {
  switch (event.keyCode) {
    case KeyCode.UP:
      game.snake.changeHeading(Direction.up);
      break;
    case KeyCode.DOWN:
      game.snake.changeHeading(Direction.down);
      break;
    case KeyCode.LEFT:
      game.snake.changeHeading(Direction.left);
      break;
    case KeyCode.RIGHT:
      game.snake.changeHeading(Direction.right);
      break;
    default:
      print('Unknown key: ${event.key}');
  }
}
Like with Flutter, the Dart Web library has convenience methods for mapping key events to common key types/combos etc. We therefore just needed to change the heading to the respect value.
Conclusion
With very little code and in a very standard modern web app development process familiar to any JavaScript developer we have been able to leverage our Dart business layer library with ease to create a web app version of our Snake App.