


 2019-05-08
in
2019-05-08
in

 6 min read
As I pick up doing cross-platform application desktop application development using AvaloniaUI I need to go through the obligatory hurdles of the “Hello World” program and following tutorials. I figure why not document them here for others too. Fortunately they actually provide some pretty solid getting started and tutorial guidelines so this should be more considered my personal notebook of those.
NOTE: This article is from 2019 and Avalonia has been under active development and improvement since that time. Please consult newer tutorials and documentation for how to use this against current releases of Avalonia.
The guide I’m following along with for this project is a riff on the Quick Start Guide published by the project. For each of the steps you’ll see two sets of instructions, one for Visual Studio on Windows and one for the .NET Core command line. I have zero intention of developing on Windows again so it’s command line or bust (well command line plus JetBrains Rider and/or Visual Studio Code on Linux or bust). So for each of the steps I followed along with the steps following the .NET core route for this hello world.
Of course the preamble to all of this is to actually install .NET and Avalonia into .NET too. The .NET SDK was easy enough to install, just go to the .NET Download Page , click on the Linux option and hit the SDK button. You’ll be taken to a page where you can select your Linux package manager of choice based on your operating system and processor type. Presently it’s all x64 but the number of Linux distributions is pretty solid. You just follow the instructions and then voila you should have .NET installed. Now it’s time to install Avalonia into your .NET Templates.
The templates are projects, object type, etc. templates that the .NET command line tool will use when you type dotnet new. Out of the box .NET when you do this has the following list in the present version (just type dotnet new with no arguments to generate):
Templates                                         Short Name         ...
---------------------------------------------------------------------...
Console Application                               console            ...
Class library                                     classlib           ...
Unit Test Project                                 mstest             ...
NUnit 3 Test Project                              nunit              ...
NUnit 3 Test Item                                 nunit-test         ...
xUnit Test Project                                xunit              ...
Razor Page                                        page               ...
MVC ViewImports                                   viewimports        ...
MVC ViewStart                                     viewstart          ...
ASP.NET Core Empty                                web                ...
ASP.NET Core Web App (Model-View-Controller)      mvc                ...
ASP.NET Core Web App                              webapp             ...
ASP.NET Core with Angular                         angular            ...
ASP.NET Core with React.js                        react              ...
ASP.NET Core with React.js and Redux              reactredux         ...
Razor Class Library                               razorclasslib      ...
ASP.NET Core Web API                              webapi             ...
global.json file                                  globaljson         ...
NuGet Config                                      nugetconfig        ...
Web Config                                        webconfig          ...
Solution File                                     sln                ...
By adding the Avalonia templates we’ll be able to create the necessary Avalonia applications, Forms, Controls, etc. as we need to to build a real project. It’s as simple as going to the Avalonia Template Github Page , pulling it down and following the instructions for adding them to the .NET runtime. A word of caution however. The runtime is going to keep looking for these templates wherever they are when you add them so make sure you like the location before you put them. I just installed them in my home directory so the registration process was as easy as:
cd ~
git clone https://github.com/AvaloniaUI/avalonia-dotnet-templates.git
cd avalonia-dotnet-templates/
dotnet new --install ./
Then when I look at the templates output by dotnet new like above I see the following (excerpted new stuf and surrounding only):
Templates                                         Short Name                ...
----------------------------------------------------------------------------...
Console Application                               console                   ...
                                     ...

ASP.NET Core Web API                              webapi                    ...
Avalonia .NET Core App                            avalonia.app              ...
Avalonia Window                                   avalonia.window           ...
Avalonia UserControl                              avalonia.usercontrol      ...
Avalonia .NET Core MVVM App                       avalonia.mvvm             ...
global.json file                                  globaljson                ...

                                     ...
If you don’t see those, that means the template process went hairwire somewhere. If you do see it that means you are ready to roll. The next step for getting your Hello World project is easy as pie. First we create a new project:
dotnet new avalonia.mvvm -o MyApp
As you saw there were two different apps available to us. Since I want to be following more of a WPF MVVM (Model-View-View Model) style design pattern I’m choosing that one. The -o option gives my app an explicit name. When dotnet creates the project it will create a subdirectory with that name. The directory structure for the app will look like:
├── App.xaml
├── App.xaml.cs
├── Assets
│   └── avalonia-logo.ico
├── Models
├── MyApp3.csproj
├── nuget.config
├── Program.cs
├── ViewLocator.cs
├── ViewModels
│   ├── MainWindowViewModel.cs
│   └── ViewModelBase.cs
└── Views
    ├── MainWindow.xaml
    └── MainWindow.xaml.cs
The later tutorials will go into the specifics of these directories and files but interesting things to point out are:
* How properly segmented the project is with respect to having sub-folders for Models, Views, and View Models (that’s kind of important for MVVM patterns obviously)
* It created our C# Project file for us so it can readily be opened in Visual Studio, Rider, etc.
* It setup the nuget.config for dependency management
Now it’s time to run it. Normally you can just run an app by typing dotnet run from the top level folder with the project. However because the project file is setup to allow for multiple deployment targets the .NET runtime is going to want you to specify which target you want to execute as. Yes, there is only one target actually listed, and yes I thought it should be able to figure it out. It didn’t however. So to run the project you simply type:
dotnet run --framework netcoreapp2.1
Where the Framework version is what you see listed in the CSPROJ file’s TargetFrameworks value. When you do that you’ll see a nice Hello World window that looks like this:
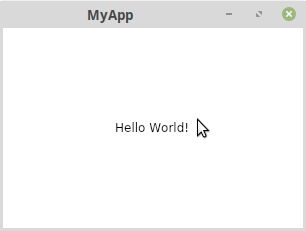
Avalonia Hello World App under Linux Mint MATE
With that you are ready to move on to the tutorial or other next steps. I’m going to be doing my work in JetBrain’s Rider IDE
. For that I’ve found that it works best when there is a solution file before importing. To create that from the root directory you simply type dotnet sln. You’ll now see a .sln file at the same level with the same name as the project file. You can then load this solution and build it in Rider right out of the box.