


 2019-06-03
in
2019-06-03
in

 4 min read
When doing visual design of forms (or in this case views) it’s often best to see what it looks like with real data. Just like with mocking data in automated tests it’s possible to use a built-in XAML feature to achieve the same thing with graphical editors. It’s a XAML field called Design.DataContext. We’ll explore that here through the standard default auto-generated MVVM application which you can follow along how to create here
. To see the final solution you’ll get at the checkout The Avalonia Example Repository
and look at the DesignDataExample or browse directly here
.
NOTE: This article is from 2019 and Avalonia has been under active development and improvement since that time. Please consult newer tutorials and documentation for how to use this against current releases of Avalonia.
When you look at the default XML and it’s view (if in AvalonStudio or Visual Studio on Windows) you’ll see the following View code and presentation:
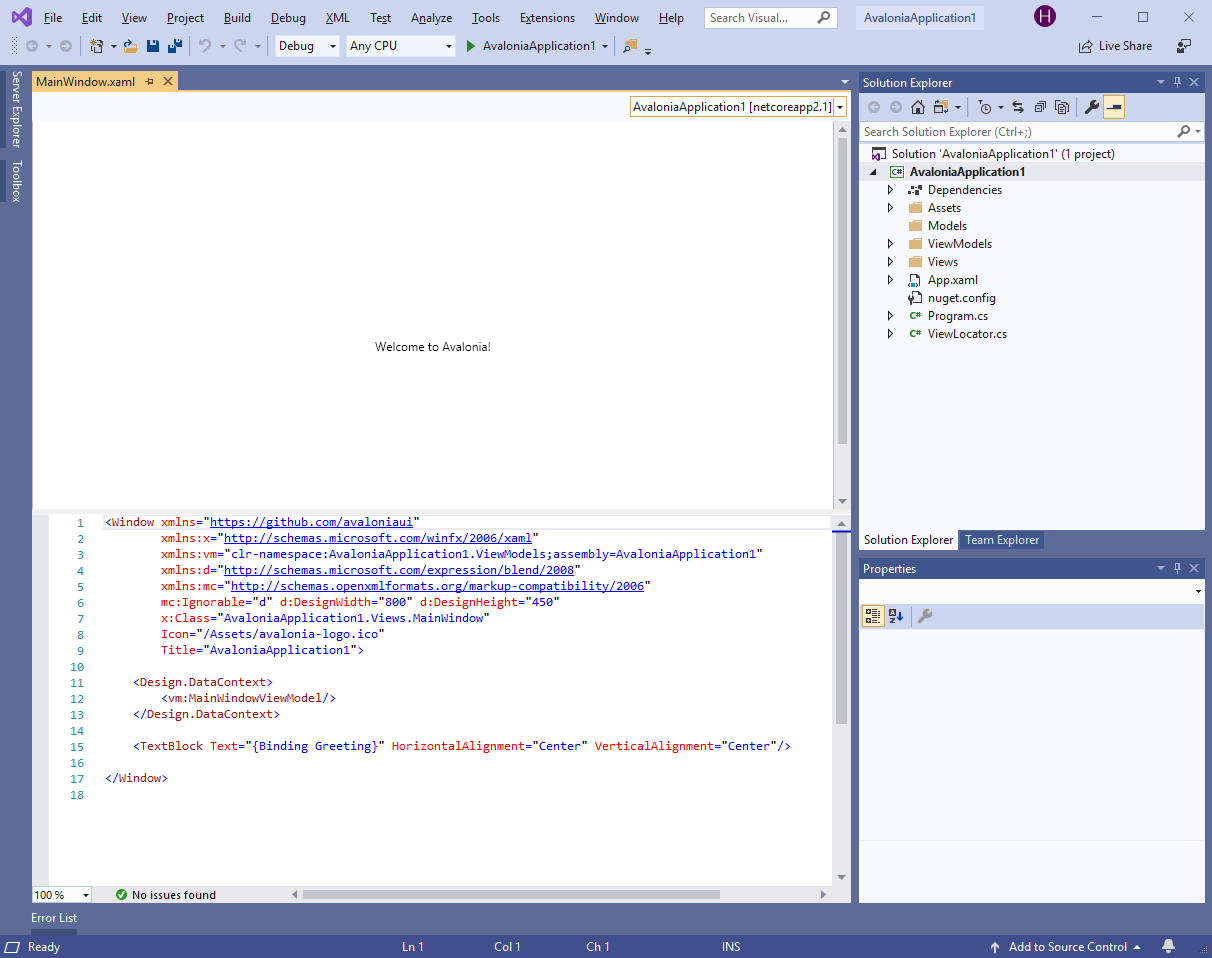
Initial MainWindow View in Default Avalonia MVVM application.
Nosing around the source code you’d find the “Welcome to Avalonia” string in the ViewModel class’s Greeting field, which is bound to the text block’s text value. At runtime the code injects the view’s ViewModel and it all comes together. At design time however none of that is executing. Instead it is the XML block near the top of the MainWindow.xaml file within the Design.DataContext which does the heavy lifting. In this case we told it to load the MainWindowViewModel so that when Visual Studio, or whatever designer we are using, tries to render it that is the data that’s created. That seems a bit superfluous until you see a way to use that same structure to create design-time specific data.
For a simple example it doesn’t really matter if we make the Greeting “Welcome to Avalonia” or something else. However for real testing we don’t want to be polluting our View Models with data that’s just there for testing convenience. With the Binding facility we can create stand in classes that have the same fields and types that the View is expecting and have that be used for rendering instead. It’s sort of an early example of how separating the program correctly with MVVM can provide many benefits in the development process. Let’s look at making a simple example of using this facility to change the greeting displayed at design time without changing the ViewModel.
First, we will create a new place to store our design data. I created a new folder called “DesignData” at the same level. You won’t want that to be bundled up at compile time and may place it elsewhere but the premise is the same: isolate your design data in the same way you’d isolate your tests. Next we want to create a new data class within there. I called mine TestGreeting and gave it the same one field as the ViewModel, so it looks like:
namespace AvaloniaApplication1.DesignData
{
    class TestGreeting
    {
        public string Greeting => "Hello from the designer!";
    }
}
Notice that this class doesn’t inherit from ViewModelBase or anything else. The important thing is that it has the same Properties with the same types as our ViewModel. That way the way it is interpreted by the design will be consistent. Now we need to let the View know it exists and use it for the design data. We do this by adding a new namespace and then using it and our class name to initialize the view. You can see the differences between the original and the updated MainWindow.xaml file below:
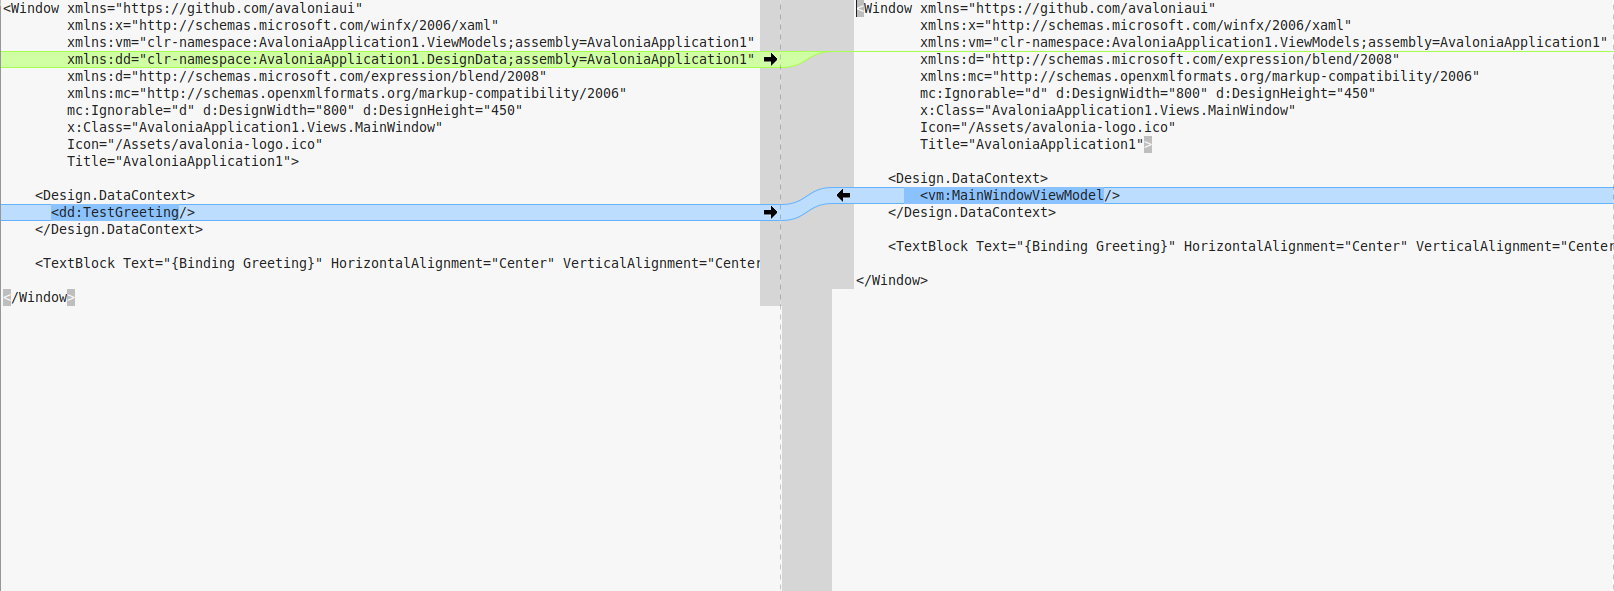
Updates to MainWindow.xaml for new design data
To get any changes to the data classes and its specifications to apply in the design you will need to rebuild the application. Once this is done however the text from the data class, not the model view will show in the designer. However when you run the application will still show the original greetings message that’s in the actual ViewModel. This is the way it looks in Visual Studio and AvalonStudio, respectively:
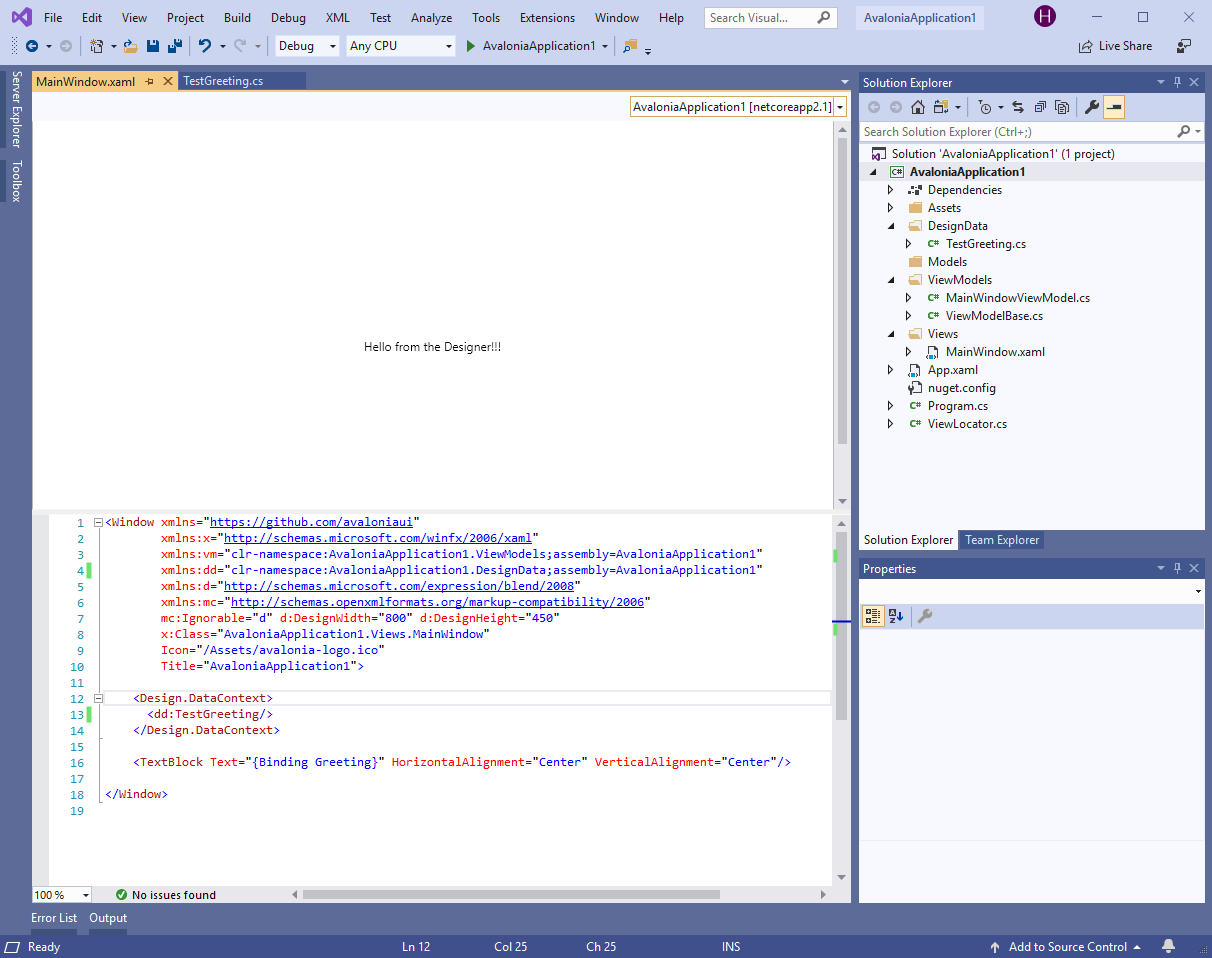
Visual Studio Screenshot of final project
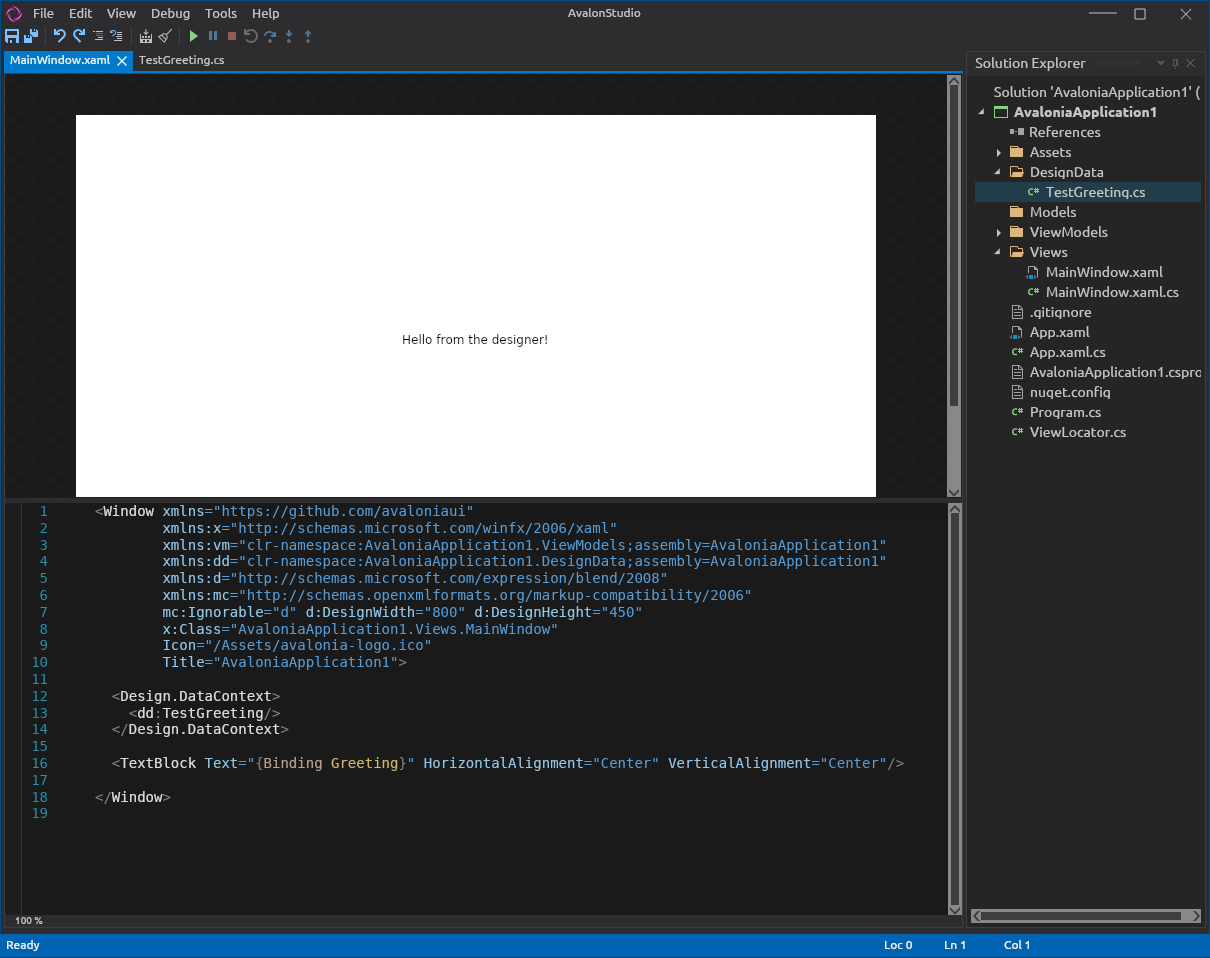
AvalonStudio Screenshot of final project
This is all obviously overkill for a simple application but imagine the power for testing data grids, or views that will be aggregated into more complex UIs, etc. It is as powerful as the unit testing mock data in helping to lay out the UI properly and take into account what the user experience will be like.